Hello there my creative friends!
I'm not sure if there is anyone out there who still reads my blog, and it feels like forever....
but I have something to share. I have admired junk journals for quite a while now,
and always wanted to make one of my own, but having never made one,
I felt quite stuck and very overwhelmed at the mere thought of it.
I experimented with coffee dying some papers, sketching, sewing,
stenciling and painting them and I finally finished my first junk journal in violet and pinks.
As I drifted away from scrap booking last year, (the love of mixed media is still very much
present in me, I just needed some new avenues to go down), the idea of creating my own
handmade journals seemed to take over my creative longings, but where to start?
There are so many layers to these books!
I also had no idea how to bind the pages together, or how to attach them to a vintage book cover.
I sat and watched a lot of tutorials, broke down into steps how
to prepare the pages, created a loose plan of how I wanted the book to look,
and then did a lot of experimenting to see what works best for me.
There was a lot of struggle with the binding, but so much joy to see the end result!
Vintage ephemera has always been an obsession of mine, and incorporating
a vintage work look to the pages was important, as was trying to include
my love of textures. So I bought myself a new sewing machine (for some
reason I only ever had old cast aways), gathered lots of vintage papers and laces,
and sewed a few pockets and added some velvety leaves to my papers to
add some interest not only visually to the book, but also some soft textures,
so that it's pleasing to actually hold the book and feel the richness of the pages.
Fabrics give a book a whole new dimension.
At the bottom of the post I'm going to write a step by step plan
as to how I created this book....for now just enjoy the photos!
Vintage charms, buttons and beads add a bit of whimsy and sparkle to a book.
Very easy to do, just leave the strings that you are using to bind the pages together in long
strands after you finish binding, then just tie on your charms. Here I used some beads I
found at an estate sale, and some Tim Holtz metal keys.
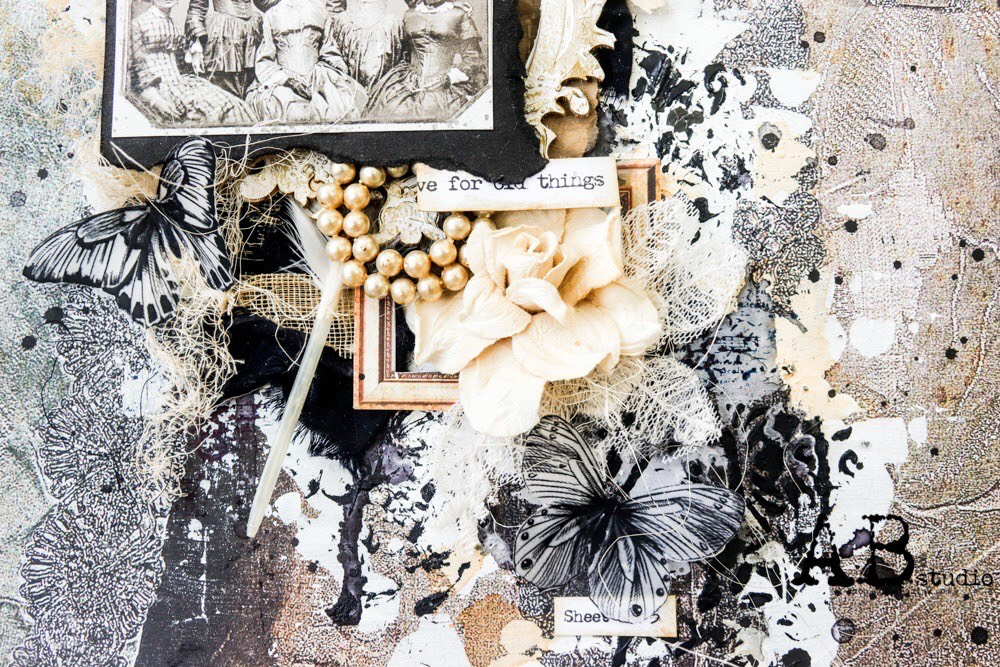
There are so many ways to add fabric and lace to your pages....here I sewed a piece of lace to
make a veil over my collage, but you can sew pockets onto pages, ripped up lace along
the bottom or sides of your papers or add some fabric as one of your signatures.
Another past time lately was to try to teach myself how to draw faces.....very challenging!
Here I was experimenting with charcoal, but got so carried away with adding
ink to the other side of this page, that I forgot to think about my sketch!
Imperfections add character, but while you get swept away in your flow
on your pages, don't forget to check if you have primed your page with
gesso or just check to see to see what you have on the back of your page :)
This was one of my favourite pages, as collaging is so fun! The results are always a surprise...
Don't forget to leave plenty of blank spaces in your journal, not only for eyes to rest,
(this page is quite busy!) but also to leave room for journaling. You can add your
thoughts about this image, memories it might evoke, some poetry,
or a little story that you want to write down so it won't be forgotten.
Here I was experimenting sewing some leaves on a piece of vintage card stock,
and I thought it would make a nice final touch to my book.
So breaking down into steps to make a journal would go something like this:
1.
Gathering your materials. A tip from an online class I took was to buy a basket just for
this project and start gathering your materials: papers of all kinds, vintage ephemera,
watercolor paper, drawing paper, and keep your eyes open for any unusual
papers that cross your path. I used lots of brown and white paper bags from
the wine store, junk mail (I especially love envelopes with clear windows),
any tissue paper you have, the papers from gifts or packaging, pieces of cardboard
boxes of varying thicknesses, and of course, vintage
books: you will use the covers, and also the inside pages.
Also be on the look out for fabric and lace: you can buy little bundles on Etsy,
but I find some really cool fabrics by buying blouses at my favourite
thrift store; they're cheap, plentiful, and the Indian ones with embroidered
flowers are so pretty! Ripped up jeans are cool too.
2.
Create your inner pages. Here I would suggest creating pages in batches. Trying to
create each individual page would be too time consuming, and also when you're
creating in batches, you'll be a lot more free in how you are experimenting with
your mediums. This way, you will have quite a bit of pages to
chose from to make a book. Another advantage is making more than one book at
a time. These journals are already tricky to make, and if you know you could
have two or three made at the end of your process, all the better! I got a cheap
plastic table cloth, and gathered all my mediums in one spot. Have fun
creating! The first thing I did, was I coffee stained all my papers in various
degrees, some totally stained, others just splashed with the coffee. There are
lots of videos on Youtube on how to do this. Then I would start by collaging,
then use gesso with either a palette knife, or with stencils and splash
around some paints or inks. You can at this point be starting to think of themes
and be adding in some photographs printed on paper, some dried pressed
flowers for a nature theme, etc.
3.
Embellishing your pages: From this point, I moved onto my sewing machine.
I used ripped up laces, and different pieces of vintage linen napkins, tablecloths,
doilies, lace trims, old shirts, anything that catches your fancy.
I sewed these cloth pieces right onto my papers,
creating pockets, borders, or sometimes using fabric to create an individual
signature. I was looking on Pinterest and was hugely inspired by cloth artists
that embroider flowers and leaves using their sewing machine. (A goal for the future...)
At this point you can also make a cover for your journal using fabrics which
I have done for my next journal and I really like how that turned out.
I ripped up some cotton blouses, strips of denim and sewed them together
horizontally, then used that entire piece for a journal cover. If you don't have a sewing
machine, no worries! Just use tacky glue to glue down some
trims or use squares of cloth to make some pockets.
4.
Pulling it all together: After I had chosen the pages I wanted to use, and the order
that they will go in, I realized that although I loved the uniqueness of the pages, they
looked a bit random and not cohesive. Here I took some time to go through and do
some mark making, stamping, adding some colors to go with my theme, and adding
a few things to pages through out the book to sort of make the whole book feel
tied together. Another thing to keep in mind is to leave some blank pages. As
you're using your journal in the future you might want to add things along the
way, and if it's for someone else ( I made one for each of my sisters), they're
going to want to personalize their journals. Here you can add different inserts,
like pages from a vintage music book, or some blank pieces of watercolor paper.
5.
Binding: This was the most challenging step for me and it took a lot of pondering
on what was going to work best, and a lot of messing about trying to decide.
There are a lot of great tutorials on Youtube on different binding methods. But you will
need some kind of thick thread or cord, a large sharp needle and an awl. You separate your
pages into signatures, making sure it's all going to fit inside your cover, mark with a pencil
where the holes will go, and then thread them together. I left the strings from the binding
long after tying the ends together, this way you can add beads and charms.
There are also lots of ways to attach your signatures to a cover. In this book, I sewed
the signatures together to a piece of thin cardboard, glued that into the spine of an old
book cover, and then glued pieces of paper on each inside cover to hide the cardboard.
6.
Creating the cover: Last step was embellishing my cover with gesso, watercolors
and a Tim Holtz frame, anything goes here, it's all up to your own personal style. Now
it's time to sit back and admire your handiwork! I was so pleased with the finished book,
that I almost forgot how frustrating it all was to make, but for a first timer,
I did alright! And I plan to keep practicing until I can whip these out, several
at time, and with different looks. Etsy has a lot of digital paper packs with pretty
themes that I want to try.....I am thinking of an Alice in Wonderland for the next one.
I hope these steps help, and that you try making one for yourself! They
would make wonderful keepsakes for friends and family.
Let me know if you do try your own junk journal or any thoughts, questions
or comments on this book I made.
Thanks for looking,
Hugs,
Lisa xoxoxox